LinkedIn can be a complex environment to navigate, and therefore it’s difficult to know if you’re using it to its full potential.
Aside from the basic version, there are some useful tools that are available in LinkedIn Sales Navigator, LinkedIn’s advanced offering.
In this recent webinar, Industry experts Shannon Murphy and Derek Marin help guide us in using Sales Navigator more effectively to the get the most out of how LinkedIn connects people together. And, how we can use these connections to make a prospect list that we can market our products to.
Some Terminology Definitions
In this article there are some terms that we need to clarify before we dive deeply into Sales Navigator:
- Clients – these are people who know you in the real world
- Accounts – the companies listed on LinkedIn
- Client leads – people connected to your clients that you may want to connect with
- Prospects – these are the filtered leads that meet the criteria you’re looking for
Webinar: How to Get Appointments with LinkedIn Sales Navigator and Maximize Sales
Hosted by Zomentum, This webinar is led by:
- Shannon Murphy, Chief Marketer for Zomentum
- Derek Marin, Founder of Simple Selling
And is split into two parts:
- Part 1: Connecting With Clients
- Part 2: Building a Prospect List
Watch the Replay of the Webinar Below
How Sales Navigator Differs from LinkedIn Basic
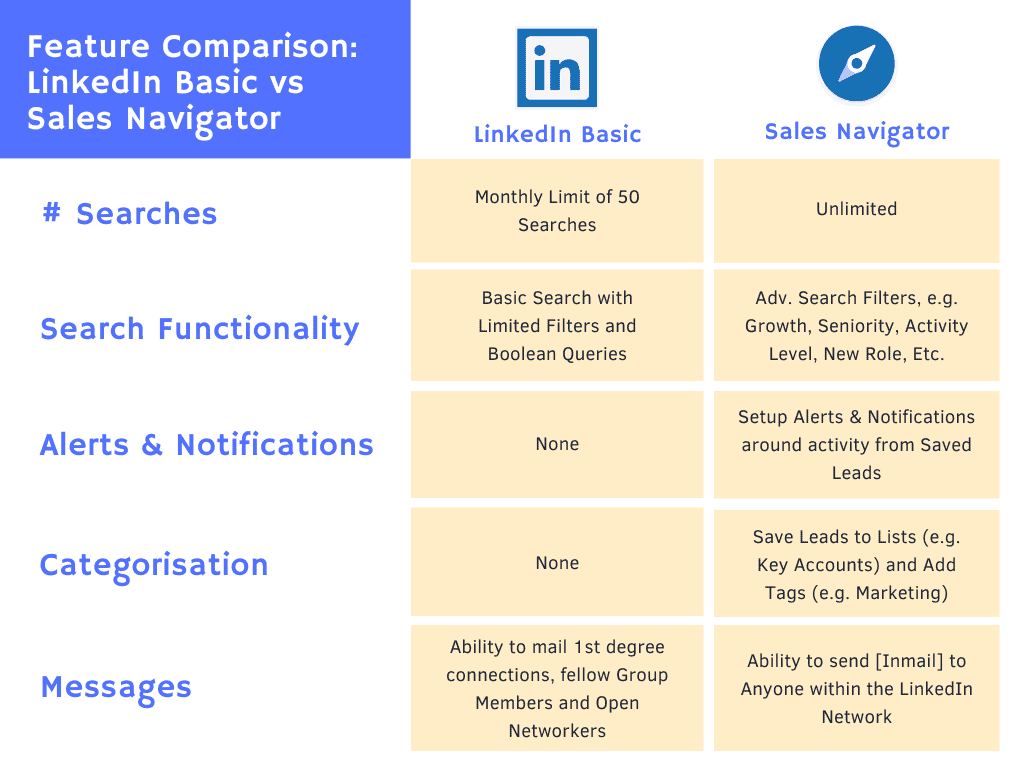
The main difference between LinkedIn basic and Sales Navigator is that the access to the LinkedIn network is unlimited, and there are a number of features that are configurable to help you to tag, filter and set alerts.
The purpose of this webinar is to show you some of these advanced features native to Sales Navigator and help you to use them in ways that will benefit you much more than the basic functions available to you in the basic version of LinkedIn.
See the feature comparison below for more details.
Part 1: Connecting With Clients
Using Sales Navigator to grow your leads and prospects begins with finding suitable clients to connect to. You might already be connected to some of your clients already, in which case you can skip to Part 2.
Creating Client Lists
The first thing to do before you set yourself up in Sales Navigator is to compile a spreadsheet with your clients’ basic information. This will help you to set up the lists in Sales Navigator.
You need to build two lists in Sales Navigator:
- A Client list, which is a list of individuals on LinkedIn you’re already connected to
- A Client Accounts list, which is a list of the companies your clients work for
Then, you’ll have to do some work on populating those lists:
- Visit their websites to get their LinkedIn company page details
- View in Navigator and save the clients to their respective client lists
- Use Lead Alerts to make networking deposits
Networking Deposits to Build Up Good Karma
With Sales Navigator now showing you when one of your clients post on LinkedIn, you can see what they post and like or comment on. This helps them to gain a wider number of impressions and achieve their networking goals. By engaging with their post in a positive way, you’re letting your lead know that you are supporting them when they receive a notification that you’ve liked or shared it.
This is a slow process, and it’s about providing value to your leads and their audience.
Send a Connect Request
When you’re ready to connect, the lead that you’re pursuing will be much more likely to engage with you, because you’ve engaged with their posts in a positive way.
When they accept your connection invitation, you’ll be able to send them unlimited messages and you’ll be able to see what connections they have that may become leads for you. In other words, you are able to widen your network now that they’re a connection.
Part 2: Building a Prospect List
Now you have some connections that you’ve built up, it’s time to build a prospect list.
This is another Leads List that you build up in Sales Navigator, and this may be one of a number of prospect lists based on different criteria.
Using Advanced Lead Filters
Lead filters are a great way to split your leads into different areas of interest. If you are based in only one or a couple of specific geographical locations, then you’re more than likely going to want to filter leads by geography. Or if you focus your service to a specific niche, then you can filter by that as well.
Connections is another useful filter. If you filter by the second degree, you’ll filter out the connections you already have at the first degree, and any third degree connections that may not be relevant.
Isolating Mutual Connections
Now that you’ve isolated the marketing-qualified leads (MQLs) you want to connect with, you can see some key information on how they’ve interacted on LinkedIn.
Sales Navigator shows you:
- Who in your list have changed jobs within the last 90 days
- Who posted on LinkedIn in the past 30 days
- Who have shared experiences with you
People who have changed jobs within the last 90 days are more likely to want to interact and make an impact in their new role.
When you select a Lead in your list, it will show a summary of their profile information. Shared connections will show up here too, and it’s with these shared connections that you find an opportunity.
Emailing a Client to Ask for An Introduction
If you can, you should email your connection and ask for an introduction. You should ask for an introduction via email, and not directly through LinkedIn. Ask if they know of anyone who might be interested in some content you’ve produced or a workshop you’re carrying out. Offer to provide them with an email template to send if it helps, and explain that it’s okay if they do not wish to do it.
Remember that they’re likely to be busy business owners themselves, so taking the effort out of it for them will be much appreciated. However, they might also be likely to help make a referral for you, if you’ might return the favour it future.
Do remember to personalise your introduction request email. Shannon Murphy said: “If you write that copy yourself, it’s going to make sure that you’re not just leaving it to somebody else to represent you and your business and maybe misrepresent you.”
Whether an introduction is made or not, you should still approach your prospect at this stage.
In Conclusion
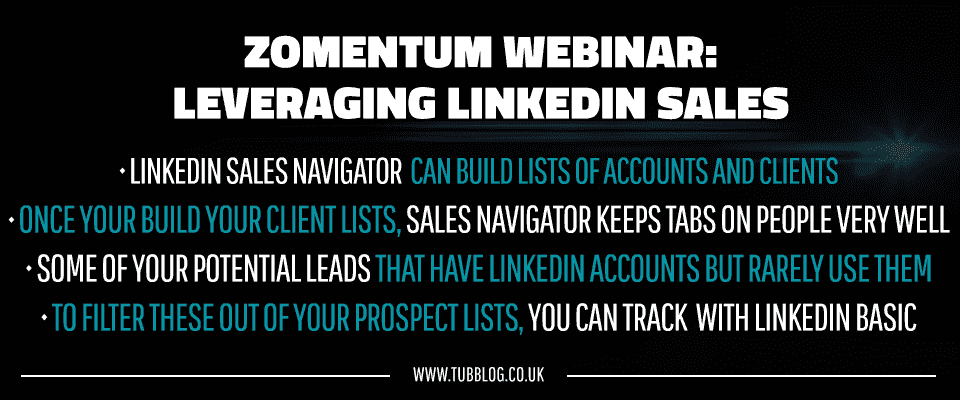
The advantages of LinkedIn Sales Navigator are that you can build lists of accounts and clients. Then you can set up alerts for these client leads to see when they interact on LinkedIn. The filters ensure you focus on the most relevant prospects.
Once your build your client lists, Sales Navigator keeps tabs on people very well.
Some of your potential leads will have LinkedIn accounts but rarely use them.
However it’s fair lyeasy to filter these out of your prospect lists, something you have to track manually with LinkedIn basic.
Do you use LinkedIn Sales Navigator? We would love to hear about your experiences with it in the comments.








Comments